iPhone Not Charging? Here’s What You Can Do to Solve the Problem

Many users have faced the frustrating issue of their iPhone not charging. This problem can come from simple software glitches or more complex hardware issues.
iPhone Not Charging

In this article, I will explain the common reasons for iPhone charging problems. I will also provide practical solutions to get your device working again.

From checking your charging cable and port to more advanced troubleshooting, I’ll guide you. You’ll learn how to fix the issue and avoid it in the future.

Common reasons why your iPhone not charging

There are many reasons why your iPhone might not charge. These can range from simple software bugs to serious hardware problems. Knowing if it’s a hardware or software issue is key to finding a solution.

Hardware vs. Software Issues

Hardware problems usually involve physical parts like the charging port or cable. Software issues might be related to the iPhone’s operating system or settings. Figuring out the type of problem is the first step to fixing it.

How to identify different charging problems

Look for signs like a dead battery, slow charging, or an “Accessory Not Supported” message. If your iPhone doesn’t charge, try a different cable or adapter to find the issue.
iphone not charging properly

What those charging symbols mean

The symbols and messages on your iPhone can give you clues. A lightning bolt in the battery icon means it’s charging. An “Accessory Not Supported” message might point to a problem with your cable or adapter.

Understanding these signs and knowing the difference between hardware and software issues can help you start fixing your iPhone’s charging problem.

Quick fixes to try first

Before we dive into complex solutions, let’s look at some simple fixes for iPhone charging problems. Sometimes, a few basic steps can solve the issue.

Force Restart your iPhone

A force restart can often fix connectivity issues, including charging problems. To force restart your iPhone, press and hold the Sleep/Wake button and the Volume Down button at the same time for at least 10 seconds. You’ll see the Apple logo when it’s done.

Switch Power Sources

The problem might not be with your iPhone but with the power source. Try charging your iPhone from a different outlet or using a different power adapter. This can help rule out any issues with the electrical supply.

Try Different Charging Positions

The way you position your iPhone while charging can affect the charging process. Make sure your iPhone is properly aligned on the charging pad or that the charging cable is correctly connected.

Proper Cable Connection Techniques

  • Ensure the charging cable is securely connected to both your iPhone and the power source.
  • Avoid bending or twisting the cable, as this can cause damage.
  • Try using a different charging cable to see if the issue persists.
iphone charging problems

By trying these quick fixes, you might solve your iPhone charging issues. If the problem continues, you may need to try more advanced troubleshooting steps or visit an Apple Store for further assistance.

Inspect and test your charging equipment

To fix your iPhone’s charging problem, check your charging gear first. Often, the issue isn’t with the iPhone but with the charging accessories.

Examining Cables for Damage

Start by looking at your charging cable for damage. Look for frays, insulation breaks, or bent pins. A damaged cable can stop your iPhone from charging.

  • Look for visible signs of wear and tear.
  • Check if the cable is frayed or broken.
  • Try using a different cable to see if the issue persists.
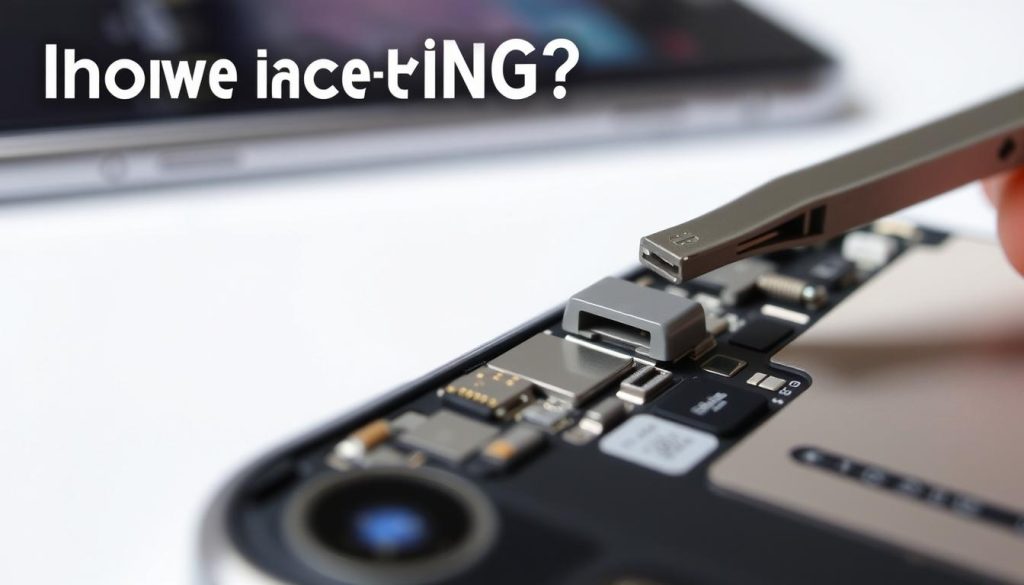
iphone not charging fix

Checking Power Adapters

Also, check your power adapter. Make sure it works by plugging it into another device. If it doesn’t work, the problem might be with the adapter.

MFi-Certified vs. Counterfeit Accessories

Using MFi-certified accessories is key for safety and compatibility. Fake accessories can cause charging problems and harm your iPhone.

How to Identify Genuine Apple Accessories

To spot real Apple accessories, look for the MFi certification. Genuine Apple products will have this mark, showing they meet Apple’s quality standards.

  • Check for the MFi certification label.
  • Verify the accessory’s packaging for authenticity.
  • Purchase from authorized Apple resellers.

By checking and testing your charging gear, you can often fix iPhone charging issues. If problems continue, you might need to do more troubleshooting.

How to properly clean your iPhone charging port

Cleaning the charging port is a simple yet effective step in troubleshooting iPhone charging problems. When debris accumulates in the port, it can prevent your iPhone from charging properly. If you’re experiencing issues like “iPhone not charging after update,” a dirty charging port could be the culprit.

Safe Cleaning Tools and Methods

To clean your iPhone’s charging port, you’ll need a few basic tools. A soft-bristled brush or a small, dry paintbrush can be used to gently sweep away debris. For more stubborn particles, a wooden or plastic toothpick can be carefully used. Avoid using metal objects, as they can damage the port.

Step-by-Step Port Cleaning Process

First, turn off your iPhone. Then, use your chosen tool to gently remove any visible debris from the charging port. Shine a light into the port to check for remaining particles. If necessary, use compressed air to blow out any remaining dust. Be cautious not to push debris further into the port.

What to Avoid When Cleaning

Avoid using liquids or inserting sharp objects into the charging port. Liquids can damage the internal components, while sharp objects can cause physical damage. Also, be gentle to avoid damaging the port’s internal pins.

By following these steps, you can effectively clean your iPhone’s charging port and potentially resolve charging issues. If problems persist, it may be worth exploring other troubleshooting steps or visiting an Apple Store for further assistance.

Troubleshooting software-related charging issues

When my iPhone won’t charge, I often look into software-related issues as a potential cause. Software problems can sometimes be the culprit behind iPhone charging issues.

Checking for iOS Updates

One of the first steps I take is to check if my iPhone is running the latest version of iOS. Outdated software can lead to compatibility issues that might prevent my iPhone from charging properly.

To check for updates, I go to Settings > General > Software Update. If an update is available, I follow the prompts to download and install it.

Reset All Settings

If updating iOS doesn’t resolve the issue, I try resetting all settings on my iPhone. This can sometimes resolve software glitches that are causing charging problems.

To reset all settings, I navigate to Settings > General > Reset and select “Reset all settings.” This will restore my iPhone’s settings to their default values without deleting any data.

Addressing Charging Issues After Updates

Sometimes, iPhone charging issues arise after updating iOS. If this happens, I check if the issue persists after restarting my iPhone.

How to Update iOS When Battery Is Low

If my iPhone battery is very low, I might need to charge it a bit before I can update iOS. I can also connect it to a power source and update it while it’s charging.

Updating iOS when the battery is low can be done by going to Settings > General > Software Update, and then following the on-screen instructions to download and install the update.

Fixing wireless charging problems

Wireless charging problems on your iPhone can be really annoying. But, there are ways to fix them. If your iPhone won’t charge right or fast, it might be the wireless charging.

Proper Placement on Charging Pads

For good wireless charging, place your iPhone right on the pad. It should be in the middle and not blocked by anything.

Compatible Cases and Accessories

Some cases and accessories can mess with wireless charging. Try taking off your case to see if it helps. Also, make sure your charging pad works with your iPhone.

Troubleshooting MagSafe Charging Issues

If you’re using MagSafe, check that it’s connected well. Your iPhone should be lined up right with it. Try restarting your iPhone or cleaning the charger and pad.

By doing these things, you should fix most wireless charging problems. You’ll be able to charge your iPhone efficiently again.

Check and optimize battery health

To fix iPhone not charging issues, checking the battery health is key. A good battery is crucial for your iPhone to work right. There are ways to make it better.

Using Battery Health Settings

iPhone has a built-in tool to check battery health. To find it, go to Settings > Battery > Battery Health. Here, you can see your battery’s max capacity and if it’s working at its best. If your battery health is low, you might need a new one.

Understanding Battery Degradation

Battery degradation happens as your iPhone gets older. It’s because of all the charging cycles. Knowing this helps you prepare and prevent problems. Checking your battery health often can spot issues early.

Optimized Battery Charging Feature

iPhone’s Optimized Battery Charging feature helps your battery last longer. It keeps your battery from getting too full. To turn it on, go to Settings > Battery > Battery Health > Optimized Battery Charging.

When to Consider Battery Replacement

If your iPhone’s battery health drops below 80%, it might be time for a new one. This is true if you’re having trouble charging or if your iPhone doesn’t hold charge like it used to.

Next steps if your iPhone still won’t charge

If your iPhone still won’t charge, it’s time to take further steps. You might need to visit an Apple Store or an authorized service provider. They can check if the problem is with the hardware and need repair or replacement.

Before going to a professional, try one more thing: restore your iPhone to its factory settings. This can fix software issues that stop charging. Remember to back up your data first, as this will erase everything on your device.

If your iPhone won’t charge after an update, it might be a software glitch. Waiting for the next iOS update or contacting Apple Support could help. For ongoing problems, you might need to replace the charging port or fix other hardware issues.

If your iPhone is still under warranty or covered by AppleCare+, you might get free or discounted repairs. Checking your warranty status and looking into repair options is important to fix your charging issue.
Share on:

Samsung Galaxy A56 User Guide: Essential Tips for Getting Started

When I opened my new phone, I couldn’t wait to see what it could do. It has a great screen and looks cool, fitting right in with today’s phones. This Samsung Galaxy A56 user guide will help me do all that and more, making sure I get the best out of my phone.

Samsung Galaxy A56 User Guide

First things first, I need to set it up right. This means setting basic settings, adding security, and getting the latest updates. With this Galaxy A56 manual, I’ll learn how to use all the phone’s features. This will make my experience with it even better.

Getting to Know Your Samsung Galaxy A56

Learning about the Samsung Galaxy A56 is the first step to enjoying it fully. As a beginner, knowing the device’s hardware and specs is key for a smooth experience.

What’s in the Box

The Samsung Galaxy A56 comes with useful accessories to start with. You’ll find a USB-C charger, earbuds, and a SIM ejector tool in the box. The device looks sleek and fits well in your hand.

Hardware Overview

Samsung Galaxy A56 display

The display is big enough for an immersive view but not too heavy. The build is strong, holding the device’s important parts.

Display and Build Quality

The display shows vibrant colors and clear images. The build feels premium, making the experience better.

Button Functions and Ports

The Samsung Galaxy A56 has a power button and volume controls on the right. The USB-C port is at the bottom for easy charging and data transfer.

Key Specifications

The Galaxy A56 runs on a powerful processor with lots of RAM and storage. It has a battery that lasts all day, great for heavy users. For more details, check the Samsung A56 manual.

First-Time Setup Process

Setting up your Samsung Galaxy A56 is easy. I’ll guide you through each step. First, insert your SIM and SD cards, turn on your device, and set up your initial settings.

Inserting SIM Card and SD Card

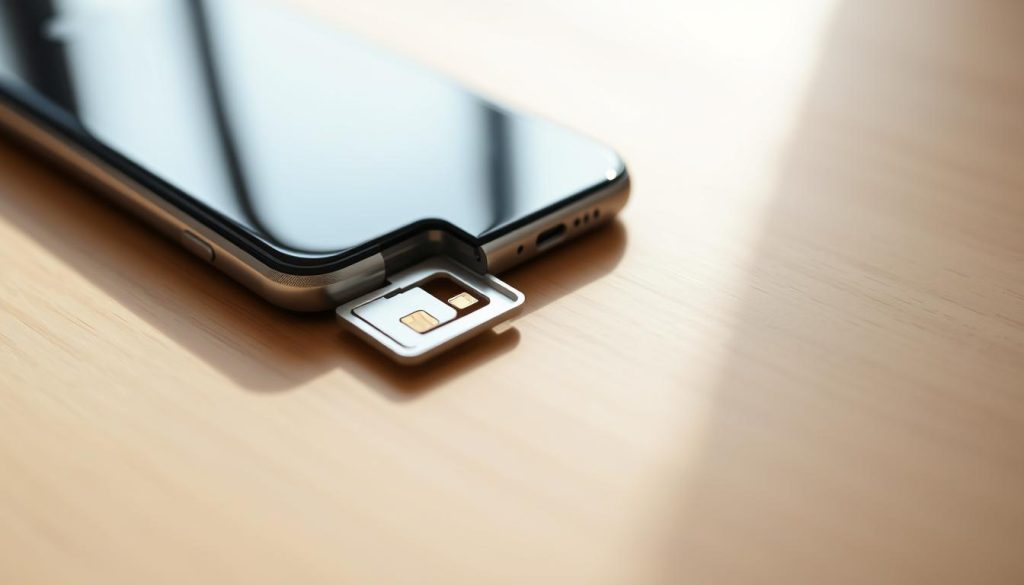
Start by finding the SIM card tray on your Samsung Galaxy A56. Use the SIM ejector tool to open it. Then, put your SIM card in carefully. If you have an SD card, insert it too. Be gentle to avoid damage.

Samsung Galaxy A56 SIM card insertion

Powering On and Initial Configuration

With your SIM and SD cards in, press the power button to turn it on. Follow the screen to choose your language, country, and Wi-Fi. You’ll also agree to terms and conditions.

Setting Up Your Samsung Account

You’ll need to create or sign in to your Samsung account. This account gives you access to Samsung’s cloud services. You can back up and restore your data, and get exclusive content.

Transferring Data from Your Old Phone

To move data from your old phone, use Smart Switch or restore from a cloud backup. Both methods are easy. They help transfer your contacts, photos, and more to your new Samsung Galaxy A56.

Using Smart Switch

Smart Switch makes transferring data simple. You can use a USB cable or wireless connection. Just follow the on-screen steps to finish.

Cloud Backup Restoration

If you have a cloud backup, you can restore it during setup. This is great if you’ve backed up to Samsung Cloud or Google Drive.

Understanding the One UI Interface

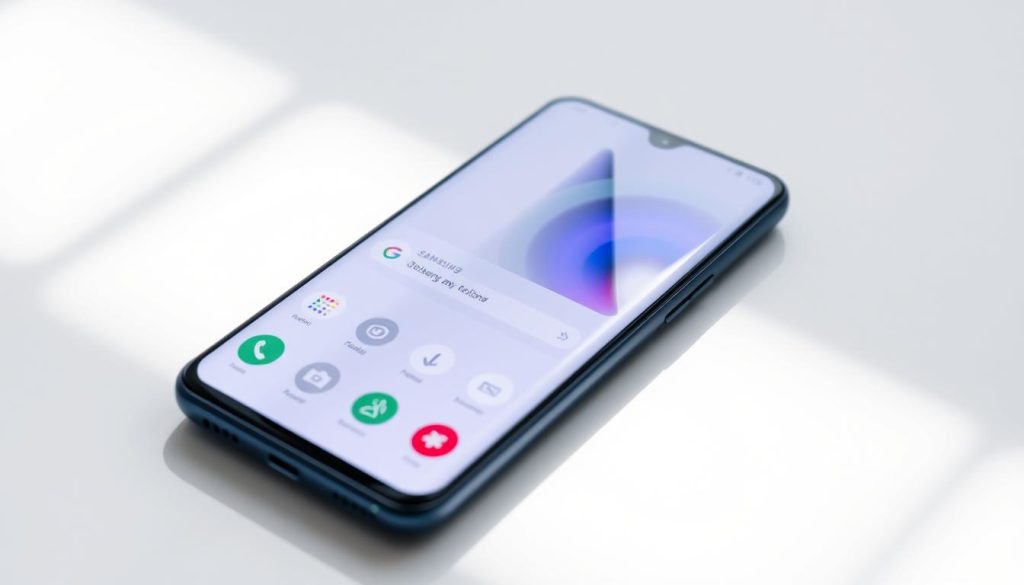
The One UI interface on the Samsung Galaxy A56 is designed for a smooth user experience. It’s easy to use, making it simple to navigate and enjoy your device’s features.

Navigating the Home Screen

The home screen is where you find apps, settings, and more. You can make it your own by adding widgets, changing wallpapers, and organizing apps in folders.

Samsung Galaxy A56 One UI interface

Using the App Drawer

The app drawer gives you access to all your apps. You can see apps in a list or grid and easily remove or disable unused ones.

Quick Settings Panel

The Quick Settings panel lets you quickly change settings like Wi-Fi, Bluetooth, and screen brightness. You can customize it to show the settings you use most.

Notification Management

Good notification management keeps you focused. You can manage notifications by app, letting you control what you see and hear.

Customizing Notification Settings

To change notification settings, go to Settings > Notifications. Here, you can adjust what each app sends you, including setting priorities and lock screen visibility.

Essential Settings to Configure

To get the most out of your Samsung Galaxy A56, you need to set up key settings. This makes your experience more personal.

Display Settings and Blue Light Filter

The display settings let you tweak brightness, screen mode, and resolution. You can also turn on the blue light filter. This helps reduce eye strain at night.

Sound and Vibration Preferences

You can change sound and vibration settings to fit your taste. This includes picking different ringtones and notification sounds. You can also adjust how intense the vibrations are.

Battery Optimization

Optimizing your battery is key to making it last longer. You can do this with power saving modes and app management.

Power Saving Modes

The power saving mode cuts down on background data use. It also lowers screen brightness and turns off features you don’t need. This helps save battery life.

App Power Management

Managing app battery use is important. You can limit how much background activity apps do. This improves your battery’s performance.

Security and Biometric Settings

Boost your Samsung Galaxy A56’s security with biometric settings. Options like fingerprint and facial recognition add extra protection.

Samsung Galaxy A56 User Guide to Camera Features

I will explore the camera capabilities of the Samsung Galaxy A56. It includes various modes and settings. These features make it easy to capture high-quality photos and videos.

Camera Modes Explained

The Samsung Galaxy A56 has several camera modes. These include Photo, Portrait, and Night mode. Each mode helps you capture the best image in different lighting conditions.

Photo Mode Features

In Photo mode, you can adjust settings like exposure compensation and ISO. You can also use the flash and HDR to enhance your photos.

Portrait and Night Mode

Portrait mode lets you take professional-looking photos with a blurred background. Night mode helps you take clear photos in low light.

Pro Photography Tips

To get the most out of your Samsung Galaxy A56’s camera, try Pro mode. It lets you manually adjust settings like exposure and focus. You can also use the timer and burst mode to capture the perfect shot.

Video Recording Options

The Samsung Galaxy A56 offers many video recording options. These include 4K resolution and slow-motion video. You can also use the camera’s stabilization feature to reduce camera shake and blur.

Editing Photos and Videos

The device comes with a built-in photo and video editor. It allows you to enhance and customize your media. You can adjust settings like brightness and contrast, and add filters and effects to your photos and videos.

Customizing Your Galaxy A56 Experience

I can make my Samsung Galaxy A56 truly mine by exploring its customization features. The device offers a variety of options to personalize its look and feel. This ensures a unique user experience.

Themes and Wallpapers

Changing the theme and wallpaper is a simple way to customize my Galaxy A56. I can pick from pre-installed themes and wallpapers or download new ones from the Galaxy Store. This lets me personalize the look of my device to match my mood or style.

Home Screen Layout Customization

I can also customize the layout of my home screen. I can change the grid size, rearrange icons, and add widgets. This way, I can create a home screen that is both functional and visually appealing.

Setting Up Edge Panels

Edge panels give me quick access to apps, contacts, and tasks. I can customize the edge panels to include the features I use most. This makes it easier to navigate my device.

Creating App Pairs for Multitasking

The Samsung Galaxy A56 lets me create app pairs for multitasking. This feature enables me to open two apps at once. It enhances productivity and multitasking capabilities.

Personalizing Always On Display

Lastly, I can personalize the Always On Display feature. I can show information like the time, date, and notifications. I can also customize the clock style and add calendar events. It’s a useful feature for staying informed at a glance.

Connectivity and Cloud Services

Exploring the Samsung Galaxy A56’s features is exciting. Understanding connectivity and cloud services is key. This part will show you how to set up different connections and use cloud services for backup and syncing.

Setting Up Wi-Fi and Bluetooth

To begin, setting up Wi-Fi and Bluetooth on your Samsung Galaxy A56 is easy. Just go to the Settings app, choose “Connections,” and turn on Wi-Fi and Bluetooth. This guide will help you connect to networks and devices quickly.

NFC and Samsung Pay Configuration

NFC and Samsung Pay make transactions easy. To set them up, go to Settings, then “Connections,” and turn on NFC. Next, follow the steps to set up Samsung Pay.

Samsung Cloud Backup

Samsung Cloud Backup is great for saving your data. Here, you can see what gets backed up and how to manage storage.

What Gets Backed Up

Your contacts, photos, and settings are saved to Samsung Cloud.

Managing Storage Space

To manage storage, open the Samsung Cloud app and pick “Storage.”

Using Link to Windows

Link to Windows lets you link your Samsung Galaxy A56 to a Windows PC. Open Settings, choose “Link to Windows,” and follow the steps to connect.

Troubleshooting and Maintenance Tips

To get the most out of your Samsung Galaxy A56, regular maintenance and troubleshooting are key. This guide will help you with common issues and their fixes.

Software updates often fix bugs and boost performance. To update, go to Settings, then Software Update, and tap Download and Install. Keeping your battery healthy is also important; avoid overcharging and try to keep the battery level between 20% and 80% if possible.

If you have Wi-Fi issues, try restarting your device or toggling Wi-Fi on and off. For more serious problems, a factory reset might be needed. But remember to back up your data first using Samsung Cloud Backup.

By following these tips and keeping your software up-to-date, you can enjoy a smooth experience with your Samsung Galaxy A56. For more detailed instructions and troubleshooting guides, check out the official Samsung Galaxy A56 tutorial resources.

Share on:

The Meta Quest 3 Price: How It Compares to Other VR Headsets

I’m excited to share insights on the Meta Quest 3. It has better performance and features. It’s important to know Meta Quest 3 price in the VR market.

The Meta Quest 3’s cost is a big deal for those thinking about buying a VR headset. I’ll compare its price to other VR headsets. This will help you decide.

Meta Quest 3 Price

Looking at the Meta Quest 3’s price and what it offers, we can see its place in the VR market. This comparison will show its benefits and possible downsides compared to others.

Understanding the Meta Quest 3 Price Point

The Meta Quest 3’s price is key to its success in the VR market. Meta’s pricing will shape what people buy and how the market moves.

Base Model vs. Higher Storage Options

The Meta Quest 3 will come in different storage sizes. The basic model will likely be priced well, balancing cost and storage. For those needing more room for games and apps, there will be pricier options.

For example, if the basic model costs $499 with 128GB, and the bigger storage version is $599 for 256GB, the extra $100 must offer more value.

meta quest 3 pricing

What’s Included in the Box

The Meta Quest 3 package will include the headset, controllers, a charging cable, user manual, and a power adapter. Some versions might also have extras like a carrying case or more controllers. Knowing what you get in the box helps judge the Meta Quest 3’s value.

Meta Quest 3 Specifications and Features Worth the Price

The Meta Quest 3 is loaded with top-notch tech that makes it worth the cost. This latest VR headset from Meta has caught a lot of eyes. And it’s easy to see why.

Hardware Specifications

The Meta Quest 3 has better hardware that boosts your VR experience. It has a high-resolution display and fast processors. This means you get smooth and deep VR interactions.

Its advanced hardware also lets you explore more detailed virtual worlds. It’s perfect for gaming and other uses.

Meta Quest3 Specifications

Software and Game Library

The Meta Quest 3’s software and games are also key to its value. It gives you access to a huge library of VR games and experiences. You’ll find popular titles and exclusive content.

The software is easy to use. It helps you find and try out new things. This is important when looking at Meta Quest 3 offers.

Mixed Reality Capabilities

The Meta Quest 3 shines with its mixed reality features. It mixes virtual and real-world elements in a unique way. This offers a fresh and exciting experience.

This feature opens up new ways to enjoy and use the headset. It makes the Meta Quest 3’s price more understandable. And it shows why it’s worth comparing Meta Quest 3 prices to other VR headsets.

How the Meta Quest 3 Price Compares to Major Competitors

To understand the Meta Quest 3’s value, we must compare its price with other VR headsets. The VR world is always changing, with many options available. By looking at the Meta Quest 3 against its competitors, we can see its pricing strategy and what it offers.

meta quest3 pricing comparison

Meta Quest 3 vs. PlayStation VR2

The PlayStation VR2 is a top VR headset for the PlayStation 5. It costs $549, which is more than the Meta Quest 3. The PS VR2 has better graphics and a deeper gaming experience. But, its price might be too high for some.

The Meta Quest3 is more affordable, starting at $499. It’s a good choice for those new to VR.

Meta Quest 3 vs. Valve Index

The Valve Index is a high-end VR headset with advanced graphics and room-scale VR. It costs $999, making it one of the pricier VR headsets. It offers top-notch graphics and a deep experience, but its price is steep for many.

The Quest 3 is cheaper and still offers great performance. It’s a better choice for those who want a good VR experience without spending a lot.

Meta Quest 3 vs. HTC Vive

The HTC Vive is known for its room-scale VR and is popular. Its price varies, but it’s often more than the Meta Quest 3. The Quest 3 is more affordable and still offers a great VR experience.

Meta Quest 3 vs. Budget VR Options

Budget VR options like the Oculus Go are cheaper, starting at around $200. But, they lack the Meta Quest3’s advanced features and performance. While cheaper, they might not offer the same level of immersion as the Meta Quest 3.

Meta Quest 3 vs. Previous Meta Quest Models

The Meta Quest 3 is better than previous Meta Quest models in performance and features. The original Meta Quest was $399, and the Meta Quest 2 was $299. The Meta Quest 3’s price is fair for its improved capabilities, making it a good upgrade.

In conclusion, the Meta Quest 3 has a competitive price that balances cost with features. By comparing it to other VR headsets, we see it offers a great value. It’s a good choice for those wanting to try VR.

Where to Find the Best Meta Quest 3 Deals

To get the best value for your money, it’s key to know where to find the best Meta Quest 3 deals. The Meta Quest 3 is available from various retailers, both online and in-store.

Official Retailers and Pricing

You can buy the Meta Quest 3 directly from Meta’s official website, as well as from other trusted retailers like Amazon and Best Buy. The price for the Meta Quest 3 changes based on the storage capacity you pick.

Checking the official retailers’ websites often can keep you updated on prices and any changes.

Current Discounts and Promotions

I watch for current discounts and promotions to help you save on your Meta Quest 3 purchase. Retailers often have special deals, discounts, or bundle offers that can lower the price.

Some retailers offer exclusive discounts or promotions. It’s a good idea to check their websites or sign up for their newsletters to stay in the loop.

Bundle Offers and Accessories

Along with the standard Meta Quest 3 price, you can look into bundle offers that include accessories like controllers, head straps, or carrying cases. These bundles can improve your VR experience and offer extra value.

When buying a bundle, make sure to see what’s included and if it’s a better deal than buying the items separately.

Making your Meta Quest 3 purchase decision

Thinking about buying the Meta Quest 3? It’s important to know its price and compare it to other VR headsets. The Meta Quest 3’s price is good, considering its advanced features and capabilities.

I’ve shared the key specs, features, and comparisons to major rivals. This gives you a full view to help you decide. Look at the value it offers, like its hardware, software library, and mixed reality features.

For the best deal, check official stores for the Meta Quest 3’s price and offers. This way, you’ll get the most value for your money.

Whether to buy the Meta Quest 3 depends on your VR needs and budget. With the info from this article, you’re ready to make a smart choice that fits your needs.

Share on:

Samsung Galaxy S25 User Manual PDF: How to Get it for Free

Understanding your new device is key to enjoying it fully. The Samsung Galaxy S25 user manual is a great tool to help you do just that. It unlocks your device’s full potential.

Samsung Galaxy S25 User Manual

I’ll show you how to get the Galaxy S25 manual for free. By the end, you’ll know how to access this important resource. You’ll be able to get the most out of your device.

Having the right documentation is essential. It helps you use your device to its fullest. In this article, we’ll see why the user manual is important. And how to get it.

Why you need the Samsung Galaxy S25 user manual

The Samsung Galaxy S25 user manual is more than just a guide. It’s a key to unlocking your device’s full capabilities. With it, you can explore your smartphone’s depths and find features you might have missed.

Samsung Galaxy S25 manual

Key features you might miss without the manual

The Samsung Galaxy S25 has many innovative features. These include advanced camera capabilities, enhanced security options, and intuitive interface settings. Without the manual, you might miss these features or struggle to use them.

For example, the manual shows you how to use the advanced camera modes. It teaches you how to take professional-grade photos and videos.

Troubleshooting made easier with official documentation

When problems come up with your Samsung Galaxy S25, the user manual is very helpful. It offers step-by-step guides for common issues, like connectivity problems or software glitches.

By using the manual, you can find and fix problems quickly. This saves you time and reduces frustration.

Official Samsung S25 manual: What’s inside

The official Samsung Galaxy S25 user manual is full of helpful information. It’s your go-to guide for your smartphone. It covers everything from basic use to advanced features.

Samsung Galaxy S25 instructions

Overview of manual contents and structure

The Samsung Galaxy S25 user guide is easy to use. It has sections on setting up your device and using the touchscreen. You’ll also learn about the home screen and various apps and features.

It also talks about customizing your device and using Samsung’s Knox security. Plus, it helps with troubleshooting common problems.

The manual is designed to be simple. It has clear headings, short instructions, and pictures. This makes it easy to find what you need and use your Samsung Galaxy S25 well.

Language options for US users

For US users, the Samsung Galaxy S25 manual instruction is in several languages. English is the main language, but it might also be in Spanish and other languages. This depends on your region and device settings.

To choose your language, you can pick it in the manual or through your device’s settings. This makes it easy to understand and use your Samsung S25 smartphone manual.

Guide to download the Galaxy S25 user guide

To get the most out of your Samsung Galaxy S25, you need to download the user manual PDF. You can do this in three ways. The manual offers detailed info on using your device, fixing common problems, and using advanced features. Here, I’ll show you how to get the Samsung S25 user manual PDF through each method.

samsung s25 pdf manual

Method 1: Samsung’s Official Website

First, visit Samsung’s official website to download the user manual PDF. Go to the support section and search for your device model. Then, find the “Manuals & Downloads” section. There, you can download the user manual PDF. This method is easy and ensures you get the official manual from Samsung.

Method 2: Samsung Members App

Another easy way is through the Samsung Members app, already on your Galaxy S25. Open the app, go to “Support” or “Manuals,” and download the user manual. The Samsung Members app makes it simple to find and download the manual and other support materials.

Method 3: Samsung Support USA Portal

Lastly, you can visit the Samsung Support USA portal. This site has support resources for US users, including the Galaxy S25 user manual. Just search for your device on the portal. You’ll find the support page where you can download the manual PDF. This method is great for finding region-specific info.

Using these three methods, you can easily download the Galaxy S25 user manual PDF. Whether you choose the official website, the Samsung Members app, or the Samsung Support USA portal, you’ll improve your device’s use. Each method offers a way to get the most out of your Samsung Galaxy S25.

Alternative ways to access your manual

There are many ways to get your Samsung Galaxy S25 user manual. You can download it in PDF format or try other methods.

Using the built-in digital manual on your device

Your Samsung Galaxy S25 has a digital manual built-in. Go to settings, then to “Help” or “Support.” There, you’ll find the manual. It’s great for quick help or learning about your device.

Third-party resources and communities

Third-party websites and forums can also help. They offer tips and insights on using your Samsung Galaxy S25. Sites focused on Samsung or tech forums have guides and tips from users.

Exploring these options lets you find the Samsung Galaxy S25 user manual in a way that works for you. Whether it’s through your device or external resources, you can get the help you need.

Troubleshooting common issues using your manual

The Samsung Galaxy S25 user manual is more than just a guide; it’s a troubleshooting companion. It offers detailed instructions for common issues you might face. By using the manual, you can quickly identify and solve problems.

Finding specific solutions in the manual

The manual is set up to help you find solutions fast. You can use the index or search for keywords related to your problem. This method saves time and helps you find the right information.

Combining manual instructions with online support

While the Samsung Galaxy S25 user manual is very helpful, using online support can make troubleshooting better. Visit Samsung’s official support website or forums. There, users share their solutions and experiences. This way, you get more tips and techniques to solve your issues.

Using the Samsung Galaxy S25 user manual and online resources together helps fix problems. The manual is easy to use, helping you understand and apply troubleshooting steps. This way, you can enjoy a better user experience with your device.

Maximizing your Galaxy S25 experience with the manual

Using the Samsung Galaxy S25 user manual can unlock your device’s full potential. It offers a detailed guide to the phone’s features. This includes the Samsung Galaxy S25 tutorial section, which covers the basics and more.

The Samsung S25 manual helps you fix common problems and explore advanced features. It also shows how to make your device run better. This guide is key to getting the best from your Samsung Galaxy S25.

As we’ve seen, finding the manual is easy. You can get it from Samsung’s website, the Samsung Members app, or your device’s built-in manual. I suggest checking the manual often to improve your experience.

By using the manual and online support, you can solve issues quickly. You’ll also keep up with new features and updates. Use the user manual to get the most out of your Samsung Galaxy S25.

Share on:

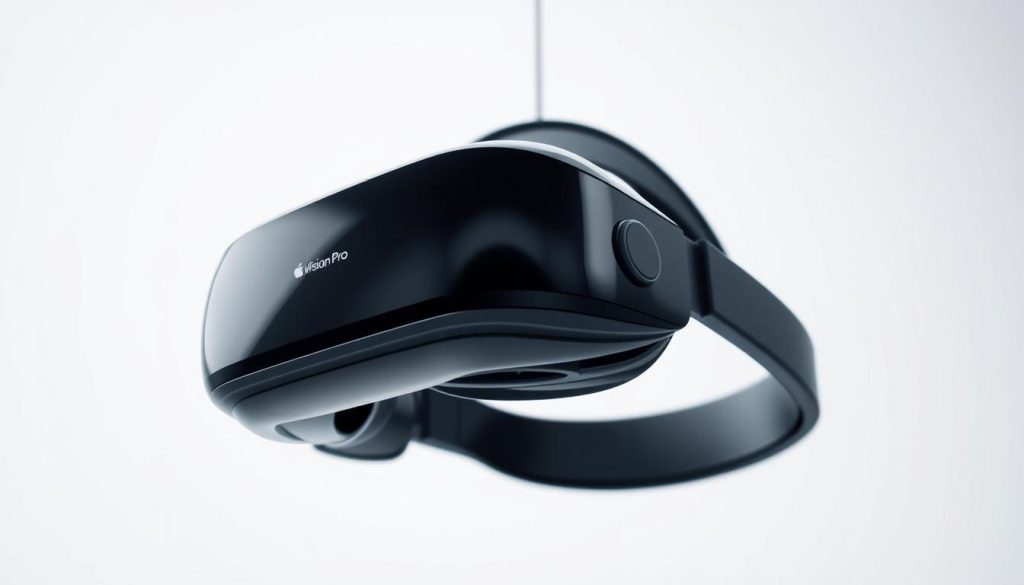
Apple Vision Pro Price: A Guide to Making an Informed Purchase

The Apple Vision Pro is a cutting-edge device from tech giants. Knowing its price and what affects it is key to making a smart buy. Looking at the main factors that influence the Apple Vision Pro price helps buyers make better choices. Whether you’re ready to buy the Apple Vision Pro or just want to know more, this guide is here to help.

Apple Vision Pro price

Buying the Apple Vision Pro is a big step in tech. To get a clear picture of its cost, we need to look at several factors. This guide will help you understand what you’re paying for.

Understanding the Apple Vision Pro price point

The cost of Apple Vision Pro depends on several factors. We’ll look at these in detail. Knowing these helps you make a smart choice.

Base Model Pricing

The base model of Apple Vision Pro is priced high. This reflects its advanced tech and new features. The starting price is about $3,499.

Storage Options and Price Differences

Storage capacity impacts the price. Apple Vision Pro has different storage options. Upgrading storage can cost a few hundred dollars more.

Apple Vision Pro Price

Additional Accessories and Their Costs

You can buy extra accessories like cases and batteries. These items improve your experience but increase the cost.

Financing Options Available

Apple offers financing to make the Vision Pro more affordable. These plans let you pay over time. It’s good to check these out to find what works for you.

What you get for your money: Vision Pro specifications

The Apple Vision Pro’s specs show why it’s a top choice. It offers a unique user experience with its advanced features and tech.

Display and Visual Technology

The Apple Vision Pro has a great display. It shows high-resolution visuals for an immersive experience. It’s perfect for gaming, streaming, and more.

Apple Vision Pro Display

Processing Power and Performance

This device runs on a strong processor. It ensures smooth performance and efficient multitasking. It handles tough tasks easily, giving a seamless experience.

Battery Life and Charging

The Apple Vision Pro has a battery that lasts long. Its quick charging system means less downtime. It’s always ready when you need it.

Build Quality and Design

The Apple Vision Pro is built to last. Its sturdy design feels premium. It’s made with quality materials for durability and comfort.

In short, the Apple Vision Pro stands out. Its advanced display, powerful processing, long battery, and premium build make it worth the investment.

Key features of the Apple Vision Pro

The Apple Vision Pro changes how we see and interact with the world. It combines new tech with a great user experience.

Spatial Computing Capabilities

The Apple Vision Pro has advanced spatial computing. It lets you easily move around and control digital objects. This makes everything feel more real and immersive.

Eye and Hand Tracking Technology

This device uses eye and hand tracking. It lets you control it with just your eyes and hands. This makes using the device very intuitive and natural.

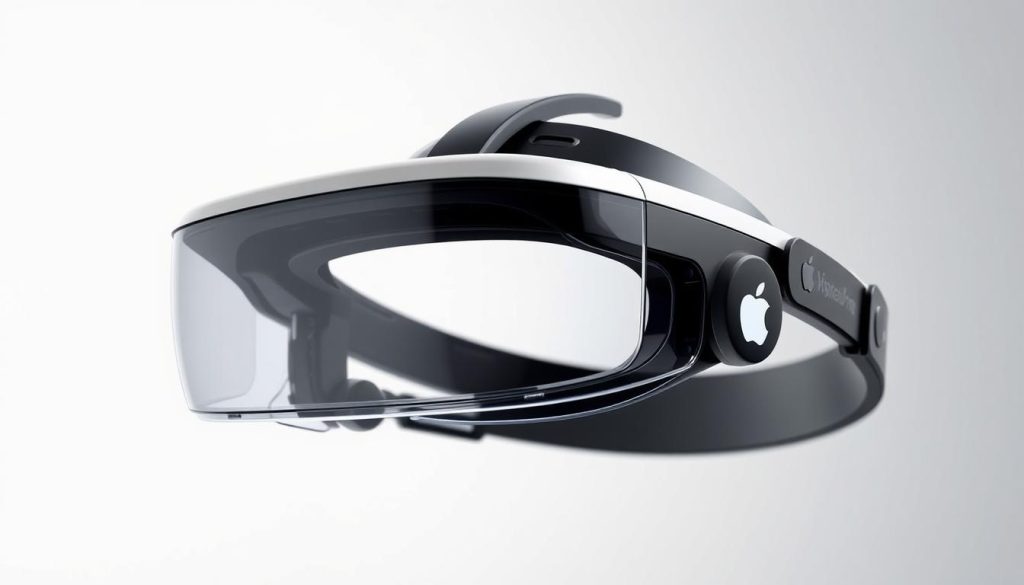
Apple Vision Pro Features

Integration with Apple Ecosystem

The Apple Vision Pro works well with other Apple products. It makes sharing and accessing content easy. You can use features like universal clipboard and airDrop.

Content and App Ecosystem

The Apple Vision Pro has a wide range of apps and content. It’s perfect for work or play. You’ll find everything from productivity tools to fun games.

Feature Description Benefit
Spatial Computing Advanced spatial awareness and interaction Enhanced immersion and productivity
Eye and Hand Tracking Intuitive control using gaze and gestures Natural and precise interaction
Ecosystem Integration Seamless integration with Apple devices Streamlined workflow and content sharing

Apple Vision Pro release date and availability

The Apple Vision Pro is coming soon, marking a big moment for Apple. People are excited to know when it will be out. They want to know the release date, where it will be sold, and how to pre-order.

Launch Timeline

Apple says the Vision Pro will hit the market early next year. The exact date is still a secret, but it will be shared soon.

Regional Availability

The Vision Pro will be sold in the US, Europe, and Asia. Apple hasn’t listed all countries yet. But it will likely be in big markets.

Pre-order Information

Pre-orders for the Vision Pro will start a few weeks before it’s released. You can order through Apple’s website and authorized stores.

The Apple Vision Pro is making a lot of people excited. As the release gets closer, more details will come out. This will help you get your hands on this cool device.

My hands-on experience with the Vision Pro

My adventure with the Apple Vision Pro started with excitement and curiosity. When I opened the box, its sleek design and top-notch build caught my eye right away.

First Impressions

Setting it up was easy, thanks to clear steps. The eye and hand tracking tech worked great, following my every move.

Performance in Real-World Scenarios

In real-life use, the Apple Vision Pro did well, tackling tough tasks smoothly. Its spatial computing was impressive, making it easy to interact with both virtual and real things.

Comfort During Extended Use

It felt okay for short times, but long use had its downsides. The weight and design were mostly good, but my eyes got tired after a while.

Pros of the Apple Vision Pro

The Apple Vision Pro shines with its top-notch tracking tech and smooth connection with Apple devices.

Cons of the Apple Vision Pro

But, it’s pricey and has limited content, which are big downsides.

Feature Description Rating
Display Quality High-resolution display with excellent color accuracy 9/10
Tracking Technology Advanced eye and hand tracking for precise control 9.5/10
Comfort Generally comfortable, but some eye strain during extended use 8/10

Comparing the Apple Vision Pro price to competitors

The Apple Vision Pro is a top-notch VR headset, but how does it stack up against others? Looking at the market, we see it’s not the only high-end option. The Meta Quest Pro and HTC Vive Pro2 also bring impressive features to the table.

Meta Quest Pro Comparison

The Meta Quest Pro is a big rival to the Apple Vision Pro. It offers top VR tech at a price that’s easier on the wallet. This makes it a great choice for those watching their budget.

HTC Vive Pro2 Comparison

The HTC Vive Pro2 is another top VR headset. It has amazing graphics and motion tracking. But, it’s also quite pricey, similar to the Apple Vision Pro.

Value Proposition Analysis

Looking at the Apple Vision Pro’s value, we must consider more than just the cost. It seamlessly fits into the Apple world, with advanced tech and a top-notch display. While the Meta Quest Pro and HTC Vive Pro2 are strong contenders, the Apple Vision Pro’s unique benefits might make it worth the extra cost for some.

Is the Apple Vision Pro worth your investment?

The Apple Vision Pro’s price, specs, and features show it’s a big deal for spatial computing fans.

Thinking about buying the Apple Vision Pro? Look at its cool tech, like eye and hand tracking, and its price.

My time with the device proved it’s worth it for some. It’s comfy and works well for a long time.

Before you buy, compare the Apple Vision Pro’s price with others like Meta Quest Pro and HTC Vive Pro2. See if it fits your needs.

In the end, the Apple Vision Pro is a smart buy for those who want the latest tech and Apple’s ecosystem. This review shows why.

Share on: